Team
Under Settings > Team, you manage access to your AMALYTIX account. You can invite additional people and control their permissions through roles.
Benefits of team management:
- Multiple employees can work with AMALYTIX simultaneously
- Permissions can be granularly controlled through roles
- Agencies can switch between multiple client accounts
Overview of Sections
The team settings are divided into three sections:
- Team Members - All active users with access to your account
- Pending Invitations - Invitations that have been sent but not yet accepted
- Roles - Permission profiles for different access rights
Create Roles
Roles define which areas and functions a team member can see and use. Create different roles for different areas of responsibility.
Examples of roles:
- Viewer - Read-only access to dashboards and reports
- Content Manager - Full access to content optimization
- Analyst - Access to performance data and reports
- Administrator - Full access including account settings
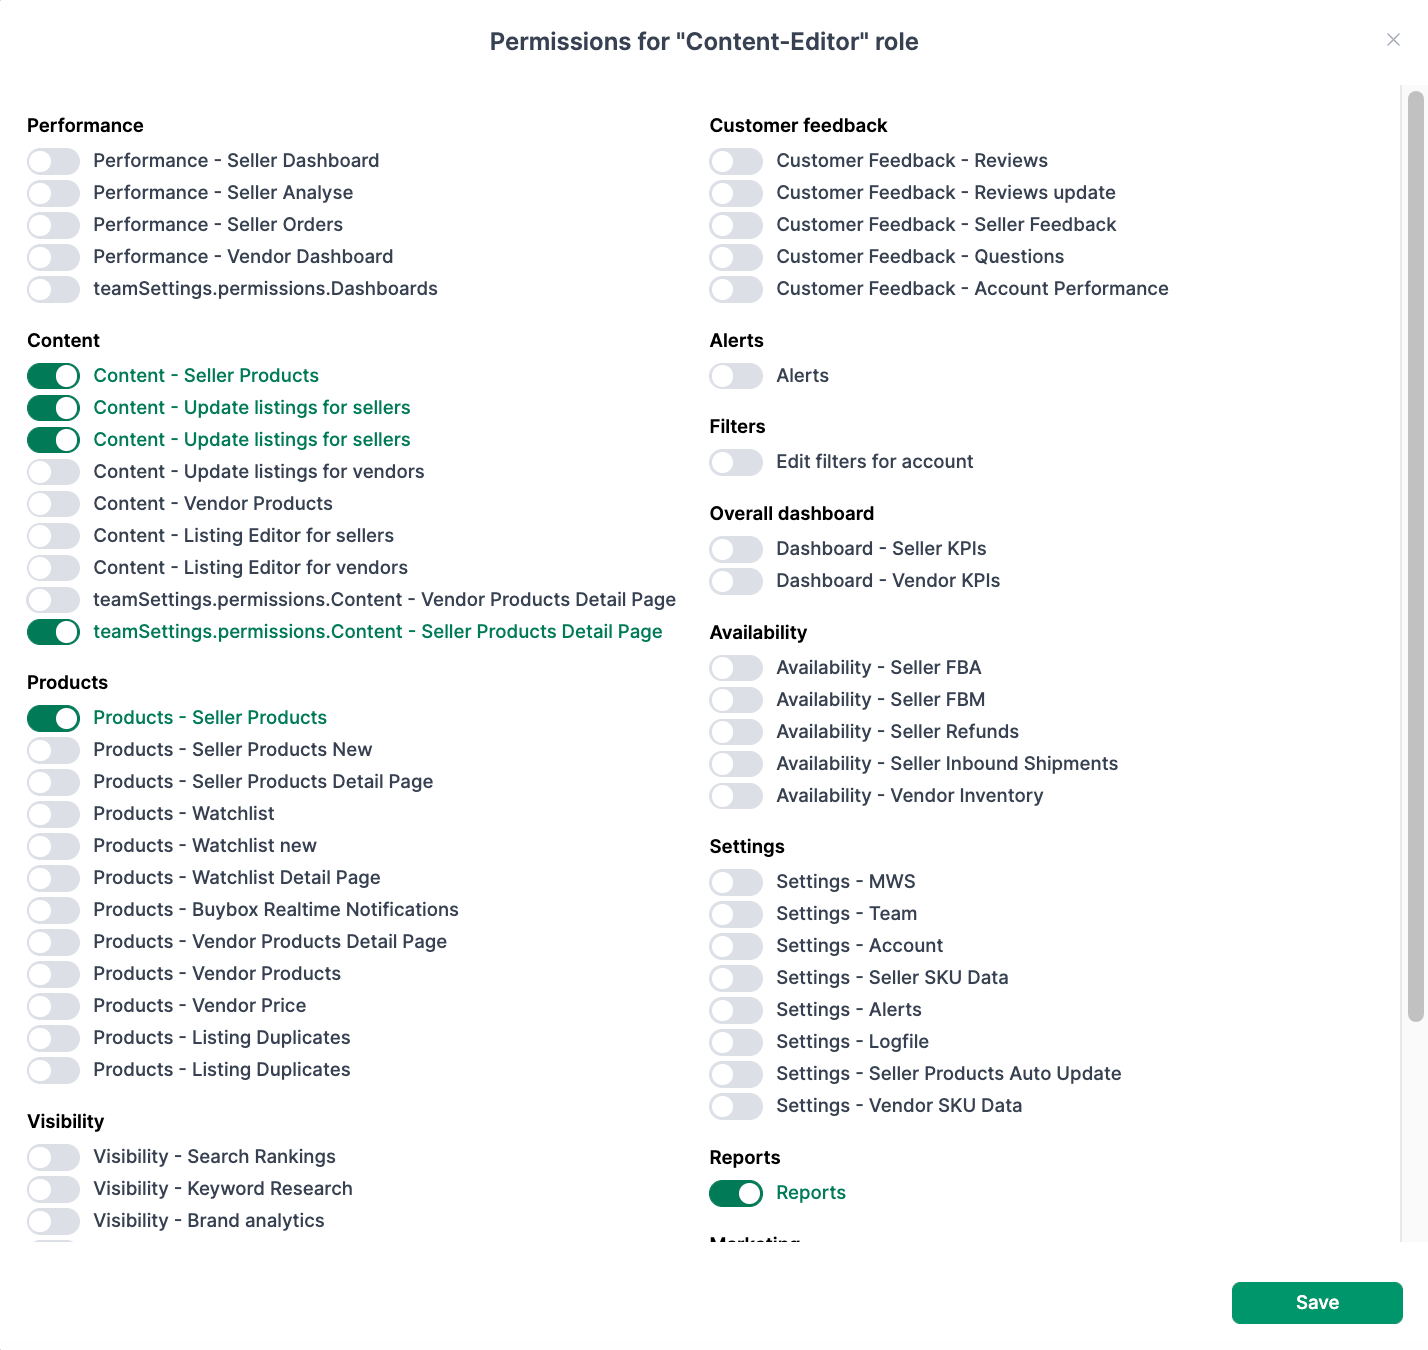
How to Create a New Role
- Enter a name for the new role
- Click Create Role
- The new role is created without any permissions
- Click Show Permissions to activate the desired rights
Invite Team Members
Once you have created the required roles, you can invite additional people to your AMALYTIX account.

How to Invite a Team Member
- Enter the email address of the new member
- Select the desired role
- Click Invite Team Member
The invited person will receive an email with a registration link. After accepting the invitation, they can log in with their own credentials.
Manage Pending Invitations
Under Pending Invitations, you can see all invitations that have not yet been accepted. You can:
- Check the invitation status
- Revoke an invitation as long as it has not yet been accepted
- Send a new invitation to the same email address
Active Team Members
In the Team Members section, you can see all people who currently have access to your AMALYTIX account.
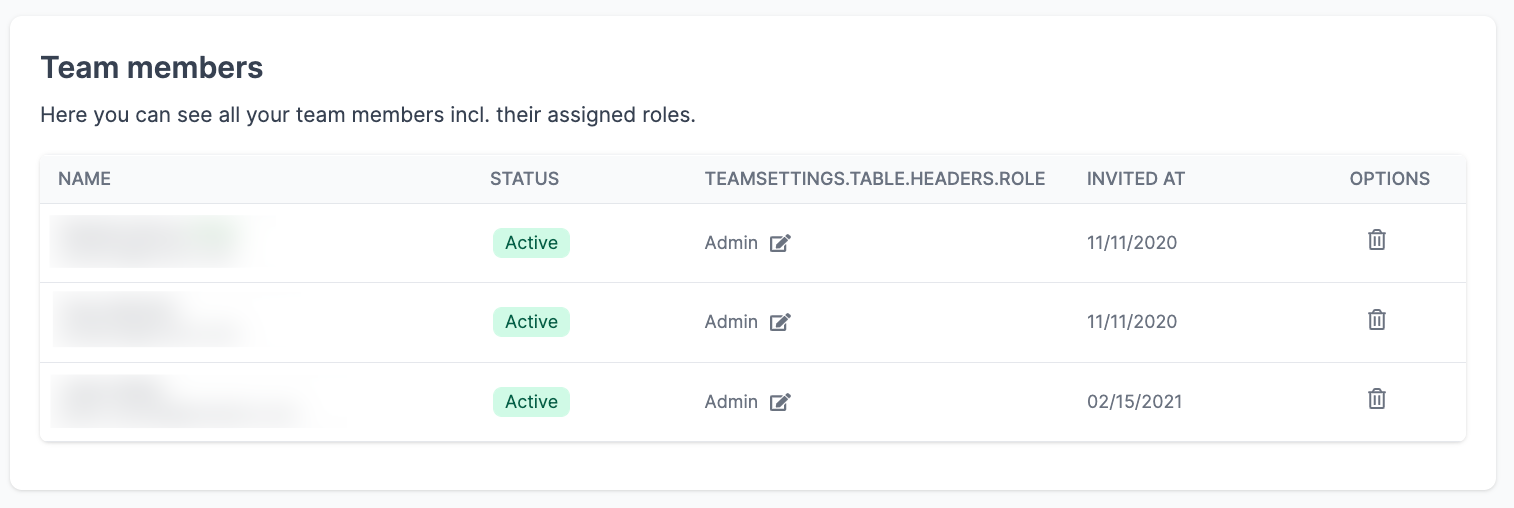
Displayed information:
- Name and email address
- Current status (active/inactive)
- 2FA status (two-factor authentication)
- Assigned role
- Invitation date
Change Roles Later
You can change a team member’s role at any time:
- Click Change Role next to the respective member
- Select the new role
- The change takes effect immediately
Access to Multiple Accounts
Team members who have been invited to multiple AMALYTIX accounts can easily switch between them.
How account switching works:
- Click on the dropdown menu in the top navigation
- Select the desired account
- You will be automatically redirected to the selected account
Ideal for:
- Agencies - Manage multiple client accounts with one login
- Companies with multiple Amazon accounts - Switch between different countries or brands
- Consultants - Access client accounts without needing separate credentials
Related Topics
- Profile Settings - Personal data and security settings
- General Settings - Account details and API connections