Team settings
Large plan required
This feature is part of our Large plan onwards. If you are on the Medium plan, you need to upgrade first.
You can now invite additional people to your existing AMALYTIX account. You can give these people detailed rights to define what they can and cannot see in AMALYTIX.
For example, as an agency, you can now easily switch between multiple accounts as long as you have access to at least two accounts.
Create roles
Using roles, you can define what a team member who has this role can see and use and whatnot.
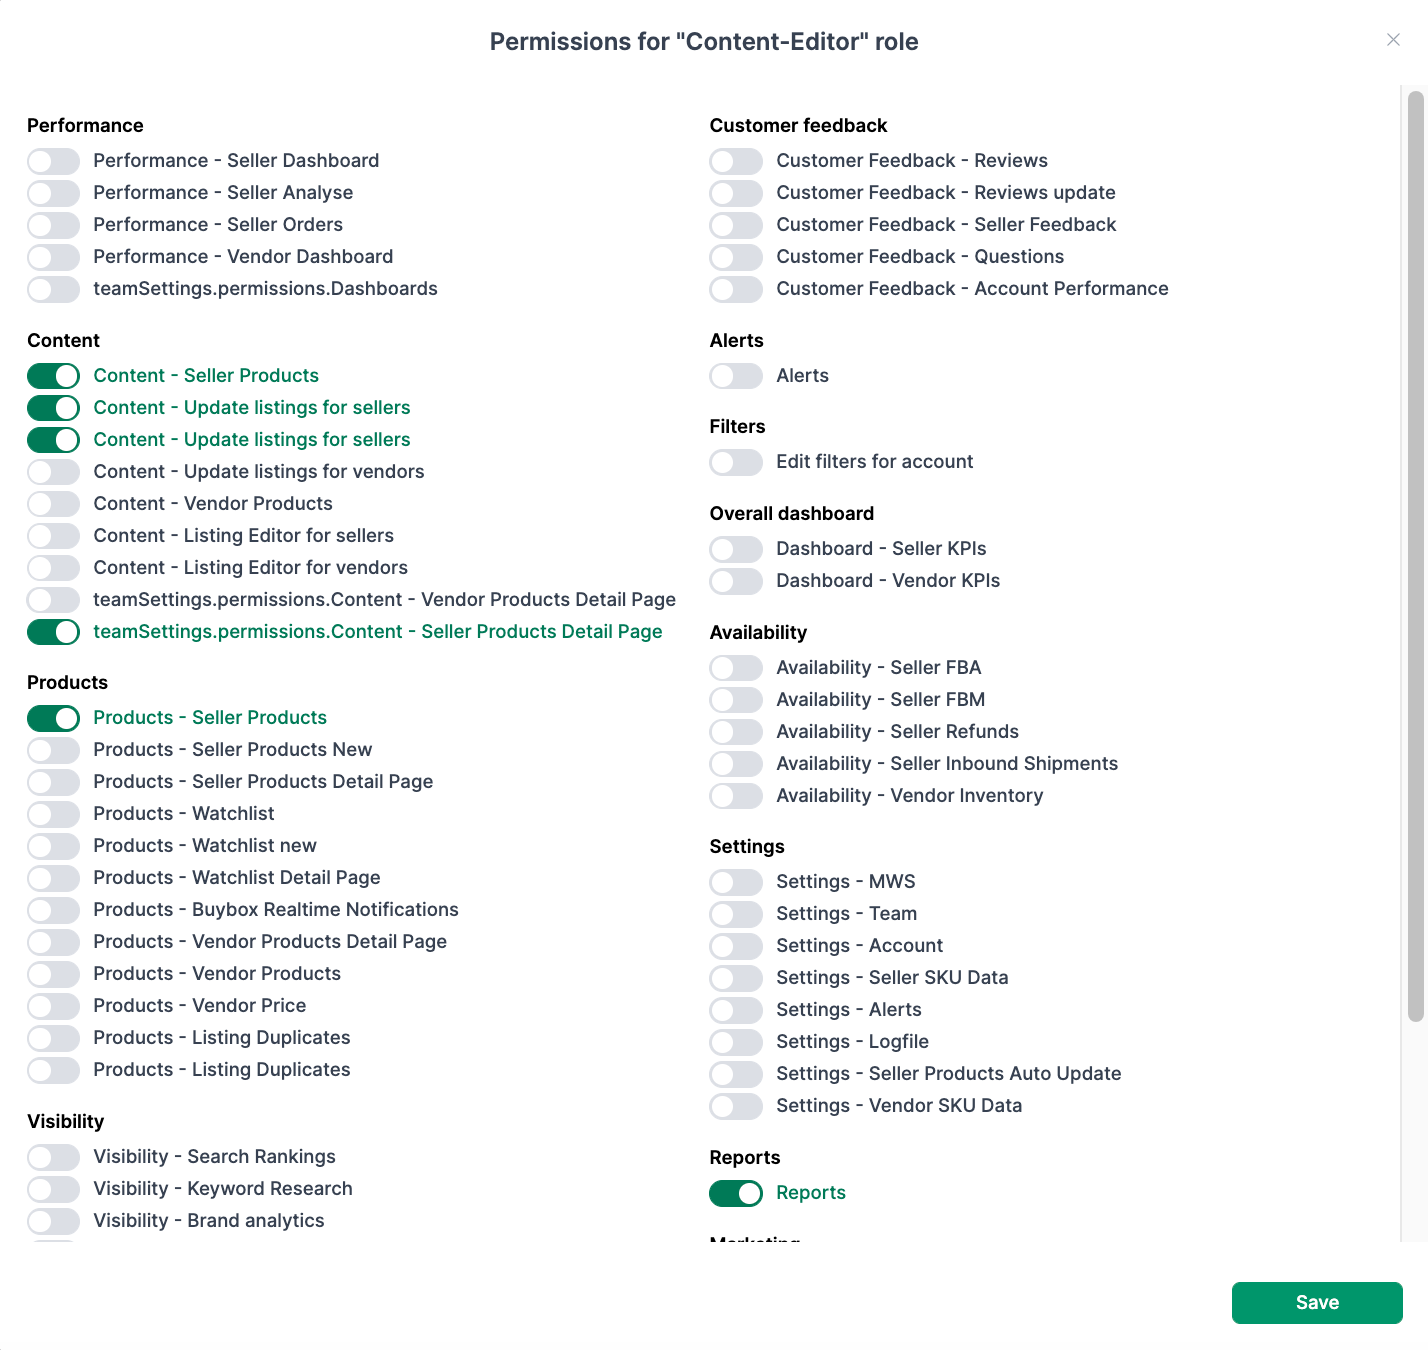
To create a new role, proceed as follows:
- Create a new role. This role has no rights at the beginning.
- Click on Show permissions after you have created it, and then activate the individual permissions one by one.
Invite team members
Once you have created the required roles, you can invite additional team members.

Add the email address of the member you want to invite and select the desired role.
You will find pending invitations under the item of the same name. You can also cancel an invitation at any time if it has not yet been accepted.
Active team members
All active members can be found under Team members. Here you can also change the roles of the members afterward. To do this, click on Change Role.

Important
At least one member must always have the admin role.
Access to multiple accounts
Once several accounts have invited a team member, this member can easily switch between these accounts using the new drop-down menu.
This is interesting, e.g., for agencies who work for several clients and manage those clients via AMALYTIX.